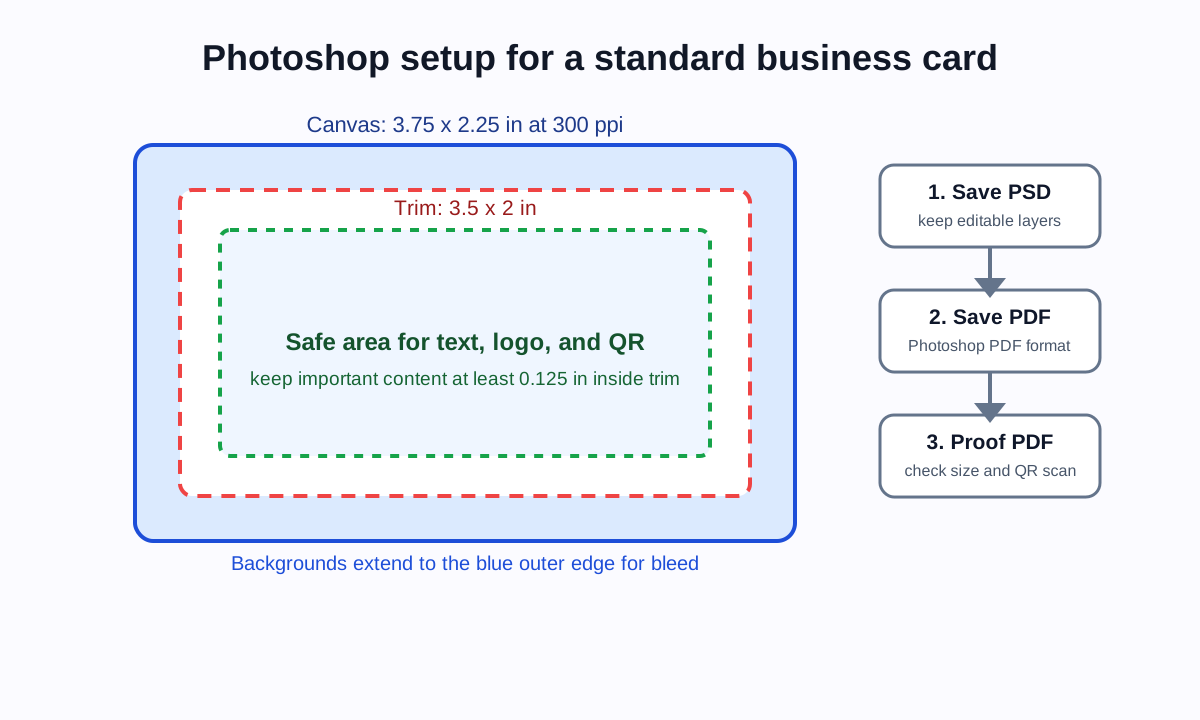
Photoshop can make a business card when the design depends on photography, texture, image effects, or a raster-heavy layout. It is less ideal than Illustrator for vector-heavy print work, so the document setup matters.
Quick answer
Create a Photoshop business card at 3.75 by 2.25 inches, 300 ppi, including 0.125 inch bleed on every side for a standard US 3.5 by 2 inch card. Keep text and QR codes inside the safe area, save the layered PSD, then export a Photoshop PDF using the printer's preferred preset.
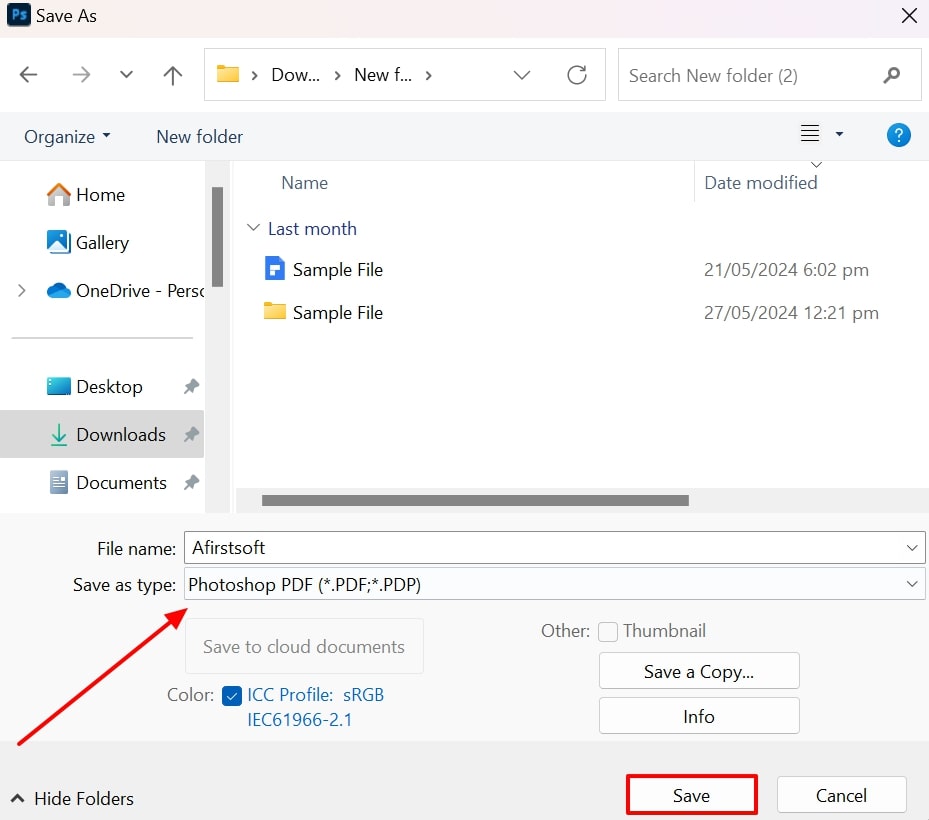
Visual reference: Photoshop PDF export screenshot from Afirstsoft's Photoshop PDF walkthrough.
Before you start
Ask your printer for:
- Trim size.
- Bleed size.
- Color mode preference.
- PDF preset or compatibility requirement.
- Whether they want crop marks.
If the printer gives you a Photoshop template, use it. If not, the common US setup is:
| Area | Size |
|---|---|
| Finished trim | 3.5 by 2 inches |
| Bleed | 0.125 inch each side |
| Photoshop canvas | 3.75 by 2.25 inches |
| Resolution | 300 ppi |
| Safe text area | At least 0.125 inch inside trim |
Photoshop does not give you the same native bleed controls Illustrator does. In Photoshop, you usually include bleed by making the canvas larger than the finished card.
Create the Photoshop file
- Open Photoshop.
- Choose File > New.
- Set units to Inches.
- Set width to 3.75 in and height to 2.25 in for a horizontal card with 0.125 inch bleed.
- Set resolution to 300 Pixels/Inch.
- Choose the color mode your printer requests. Use CMYK Color if the printer asks for CMYK. Use RGB only if the printer's workflow asks for RGB uploads.
- Create the document.
- Save it as a layered PSD before you start exporting print files.
For a vertical card, swap the width and height.
Add trim and safe area guides
Use guides so you can see what will be cut away.
- Turn on rulers with View > Rulers if they are hidden.
- Add guide lines 0.125 inch from each outer edge. These show the finished trim.
- Add another guide at least 0.125 inch inside the trim on all sides. This is the safe area for text, logos, and QR codes.
- Extend background colors, photos, or textures all the way to the outside edge of the canvas.
- Keep names, email addresses, phone numbers, and QR codes inside the safe area.
Add a QR code in Photoshop
- Generate the QR code from the destination you want people to open.
- Download the original QR image. Do not screenshot it.
- Place it with File > Place Embedded or File > Place Linked.
- Keep it square while resizing.
- Put it on a light, quiet background.
- Leave clear space around all four sides.
- Test the QR code on screen and again from a printed proof.
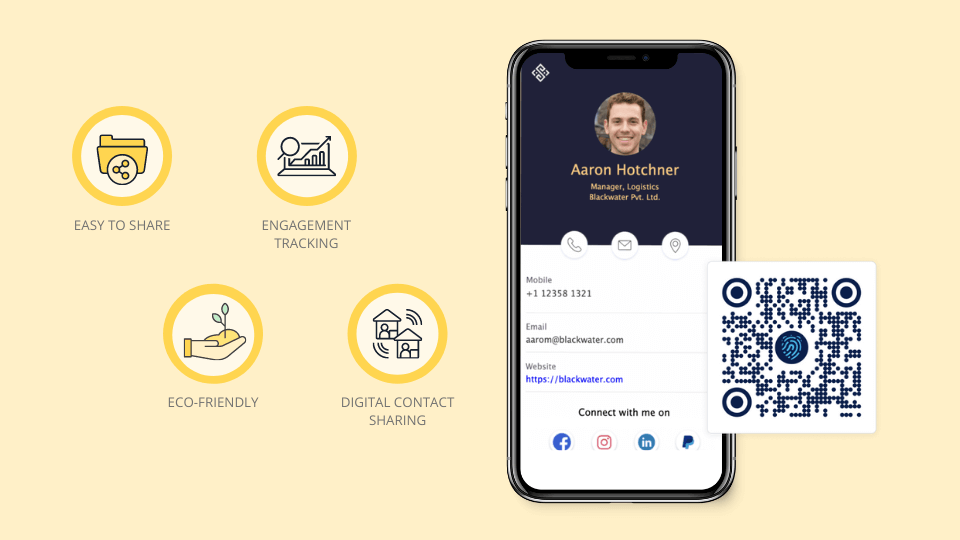
If the QR code points to a live Zapped profile, you can change the profile later without reprinting the card.
Export a Photoshop PDF
Adobe's current Photoshop help says to use File > Save As and choose Photoshop PDF from the format menu. If your Photoshop version requires it, use File > Save a Copy to access Photoshop PDF.
- Save the editable PSD first.
- Choose File > Save As or File > Save a Copy.
- Select Photoshop PDF.
- Keep the color profile embedded if your printer wants managed color.
- Choose the PDF preset your printer recommends. If they do not give one, start with a high-quality print preset and confirm with the printer.
- Review compression settings so images stay high resolution.
- Save the PDF.
- Open the exported PDF and check the page size before uploading it.
Final preflight checklist
- Canvas includes bleed.
- Important text is inside the safe area.
- Photos are sharp at print size.
- Logo is high quality.
- QR code scans from printed paper.
- Spelling, phone number, email, and URL are correct.
- The printer confirms whether crop marks are wanted.
Common mistakes
Setting the canvas to 3.5 by 2 inches
That is the trim size, not the bleed size. If your design has a colored background or photo to the edge, use 3.75 by 2.25 inches when your printer asks for 0.125 inch bleed.
Placing text too close to the edge
Cutting can shift slightly. Keep text and QR codes away from the trim line.
Exporting only a JPEG
Some printers accept JPEG, but PDF is usually easier to proof and can preserve a more reliable layout. Follow the printer's upload requirements.
Where Zapped fits
Photoshop handles the visual design. Zapped handles the live destination behind the QR code or NFC card. Put the Zapped QR code on the Photoshop layout, then update the profile online when your details change.
Sources
- Adobe Help, save as Photoshop PDF for current PDF export steps.
- Adobe Photoshop product page for Photoshop product context.
- Afirstsoft, how to save as a PDF in Photoshop for the Photoshop PDF visual reference.
- Zapped digital business card features for QR, NFC, and editable profile workflows.